How to install your own security camera for your unit in your Estate or Complex!
Everyone wants to feel secure in their homes – especially with summer on our doorsteps. Sleeping with your windows or even doors open is a luxury in South Africa. So, what do we do? We look at intricate security systems on the internet that only technicians or even electricians can install, without realizing that there is a simpler and more affordable option that we can use.
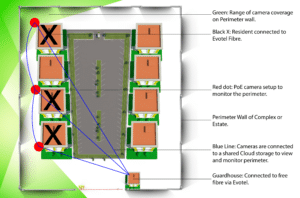
One of our consultants recently went through the process of getting a security camera in his complex. There have been multiple break-ins recently, and the body corporate just shrug their shoulders at the complaints. Here’s how the process went.
We looked at smart cameras – some needed wiring done and would be too much trouble to get installed. We looked at smart cameras that aren’t as smart as they look, and finally we discovered the answer – POE (Power over ethernet).
Now what does that mean: POE basically means that your camera can get power through an ethernet line (internet cable) connected to your router. But here’s the catch – it can’t connect directly to your router; you need a switch with a POE supported port.
Our consultant bought the switch and started testing it during loadshedding. It seemed that the switch needs 220V to work and that his power bank and invertor couldn’t run the switch and router. So, he went back to researching, and after asking some friends in the industry, he figured out that he needs a POE injector.
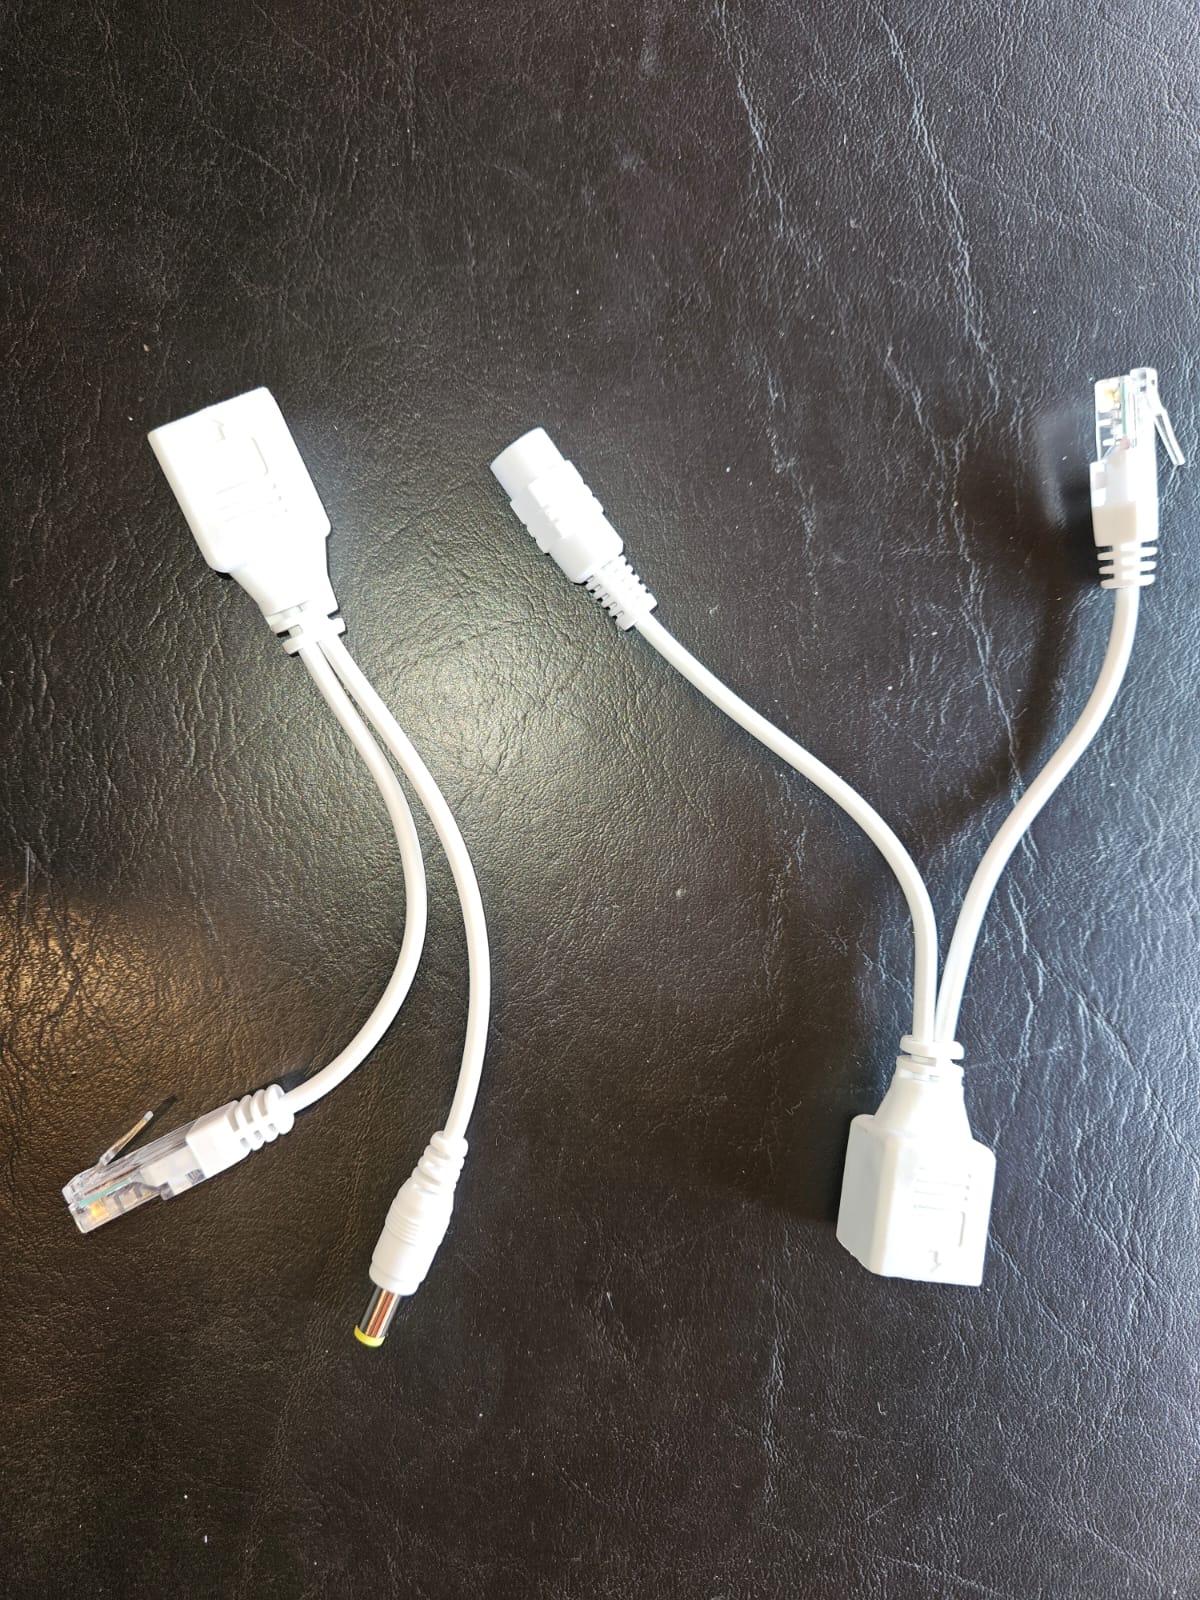
This little box as big as a matchbox (Sizes may differ from brand to brand) can be powered by a power bank and lo and behold after connecting the Camera to the POE injector and from there to his router – everything was working! Let’s show you how to install your own security camera!
So, what do you need to setup your camera at home, DIY?
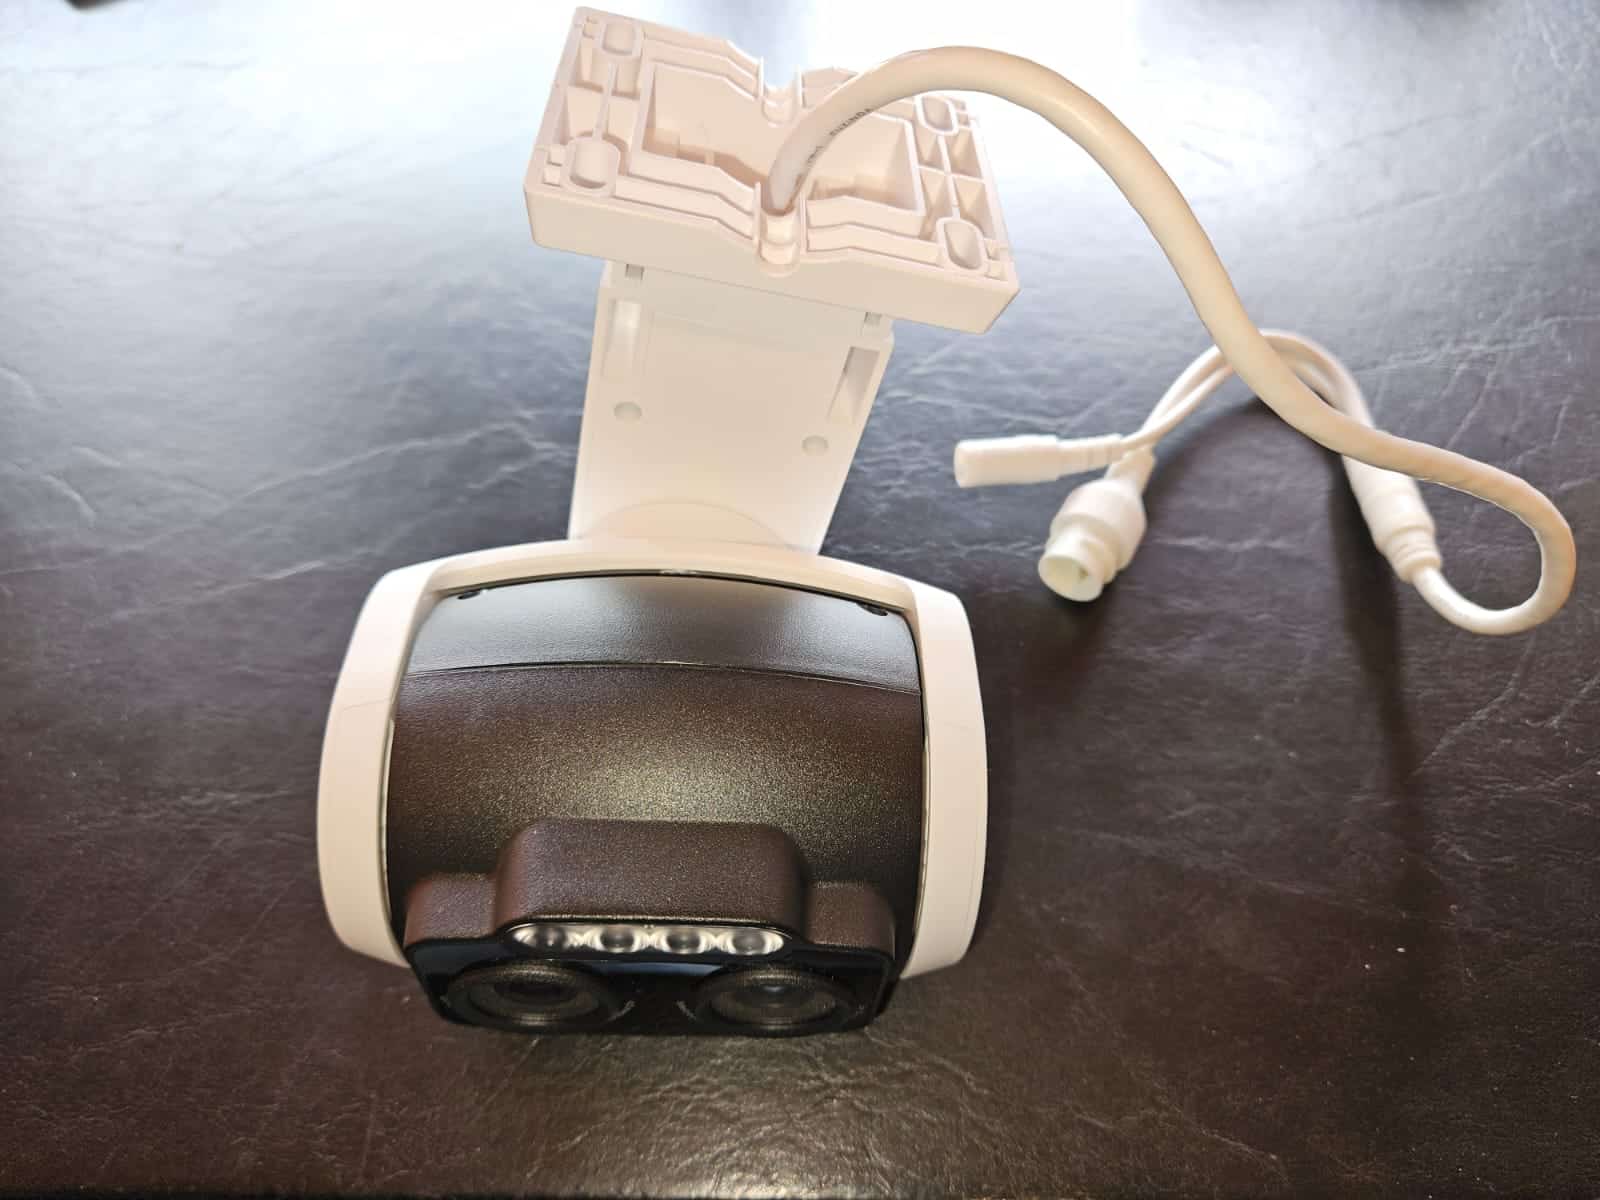
- IP camera(s) – (POE Camera – we used the TP-Link POE IP camera line)
- 1 PoE injector per IP camera
- 1 existing [non-PoE compliant] switch (Router)
- Cat5e, Cat6, or Cat6a Ethernet cables
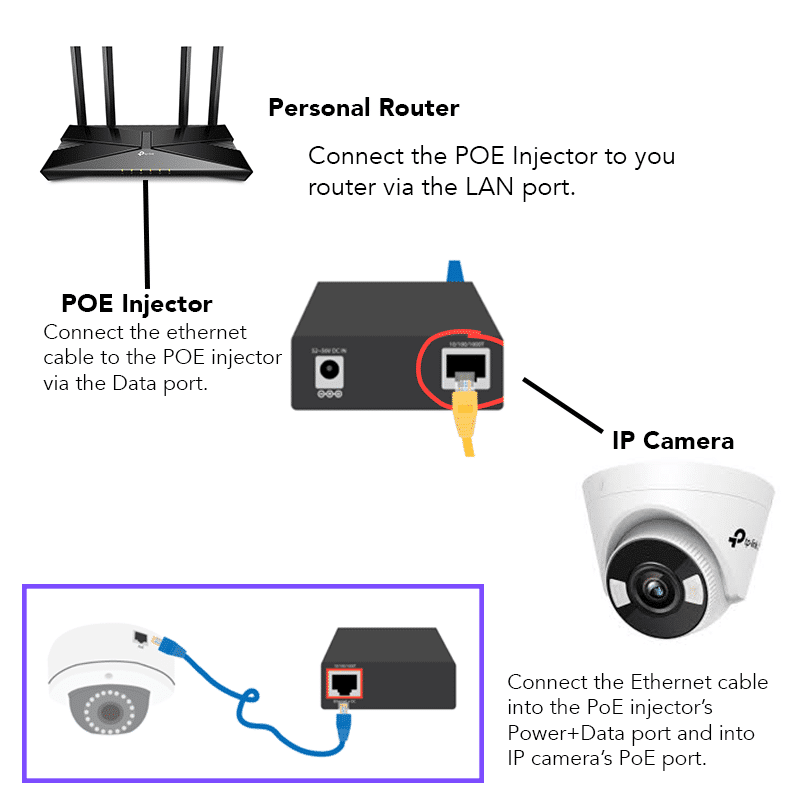
How to connect your Camera to the Injector and the router:
- Connect the PoE injector to your router via the LAN port on the Router and via the Data port on the injector.
- Connect the Ethernet cable to the PoE via the injectors Power/Data port and into the IP camera’s PoE port.
- Ensure your router has power.
- As the levels of sophistication of smart technology increase, so do the power requirement. PoE is considered low power. For instance, they may be activated by motion sensors. This saves on power usage but may also demand more power once the camera and the sensor go into operation.
That’s why it’s important to check how much power your IP camera requires before purchasing your PoE injector.
Injectors can deliver 30W, 60W [Type 3], or 90W [Type 4] of power. These levels correspond with the IEEE 802.3at [Type 2] and IEEE 802.3bt [Types 3 and 4] standards respectively.
This whole process is simple once you understand the function and requirements for each component to install your IP camera.